
This Pure2 product activation is a mandatory process required to be completed on the first run of the device. It is needed to validate your product warranty and to start using the product.

To activate your product, please make sure to follow the instructions listed. Bear in mind that internet connection is required for successful product activation.

DOWNLOAD THE Pure2 USER MANUAL

Step 1: Getting Started

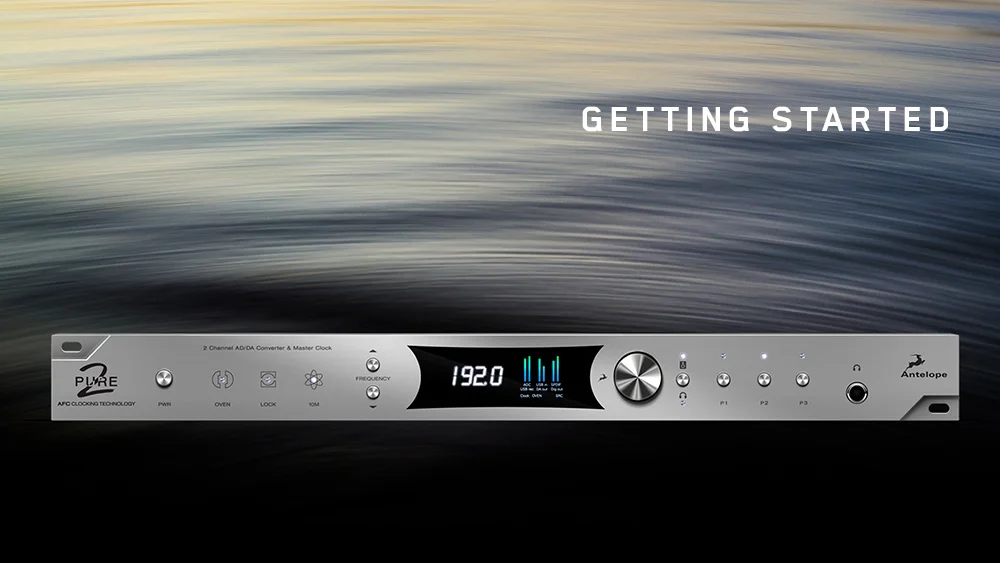
Getting Started The Pure2

Connect the Pure2 to a power outlet using an AC power cable. Plug in the device to your computer using a USB cable.

Step 2: Install the Pure2 Launcher/Control Panel (macOS & Win)

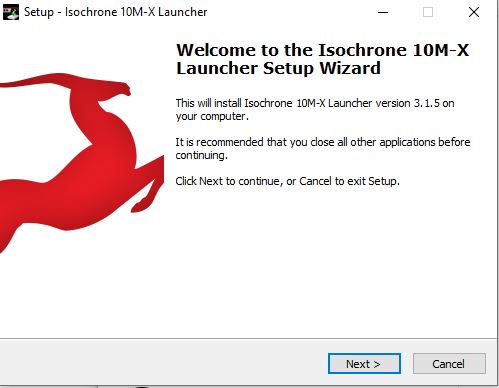
Download and install the Pure2 Launcher/Control Panel application for Windows or macOS from here.

Open and install the Launcher/Control Panel by following the steps in the installation wizard.

10mx start wizard

Step 3: Create an Antelope Audio user account

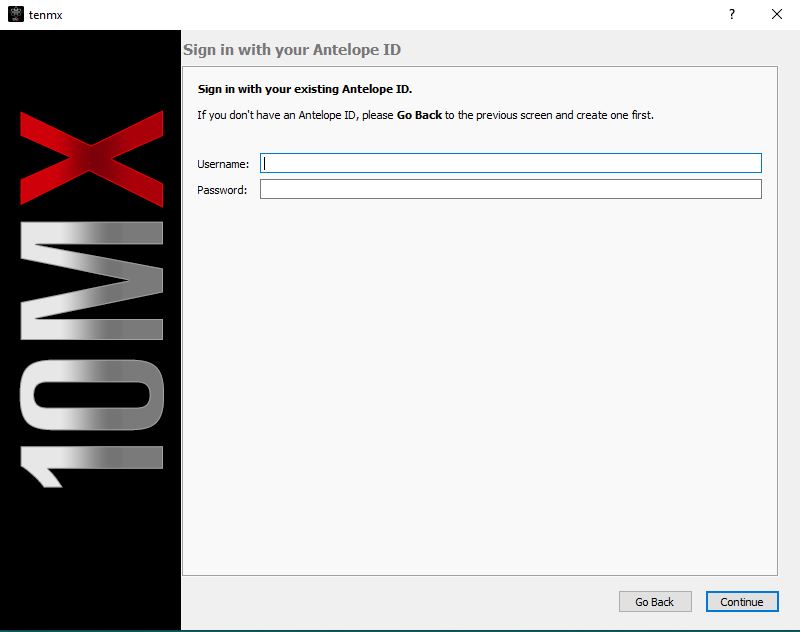
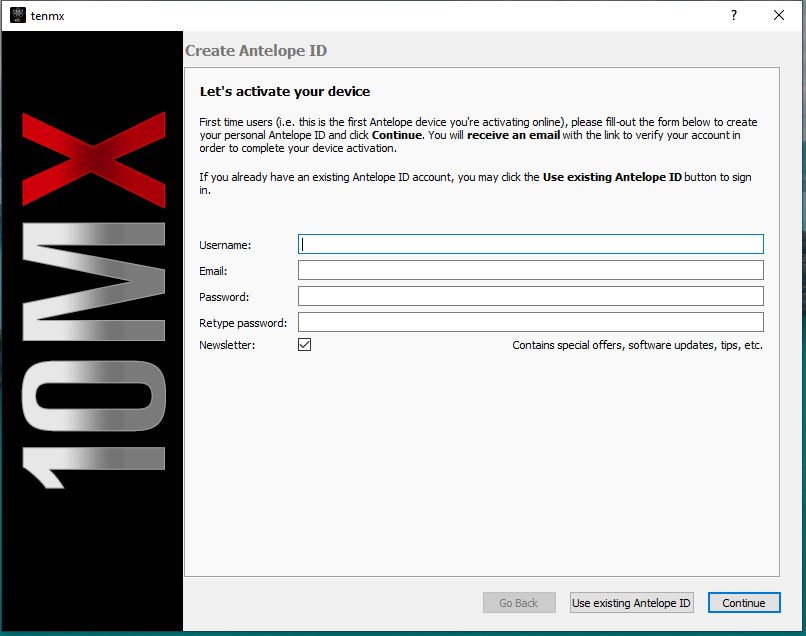
To activate your device, you will need to create an Antelope account.
To create an account, please click here.

If you already have an Antelope account, you can proceed to the next step.

Step 4: Activate your Pure 2

Sign in using your credentials. If you have just created your Antelope ID, do not forget to activate it using the link in the e-mail you have just received.

10mx get started 2

After successfully signing in your Antelope ID, you will be asked to fill in additional information concerning your recent purchase.

10mx get started 3

Once you have filled in the required information, click Done. You can now begin using your Pure2.

Step 5: Activate your product warranty

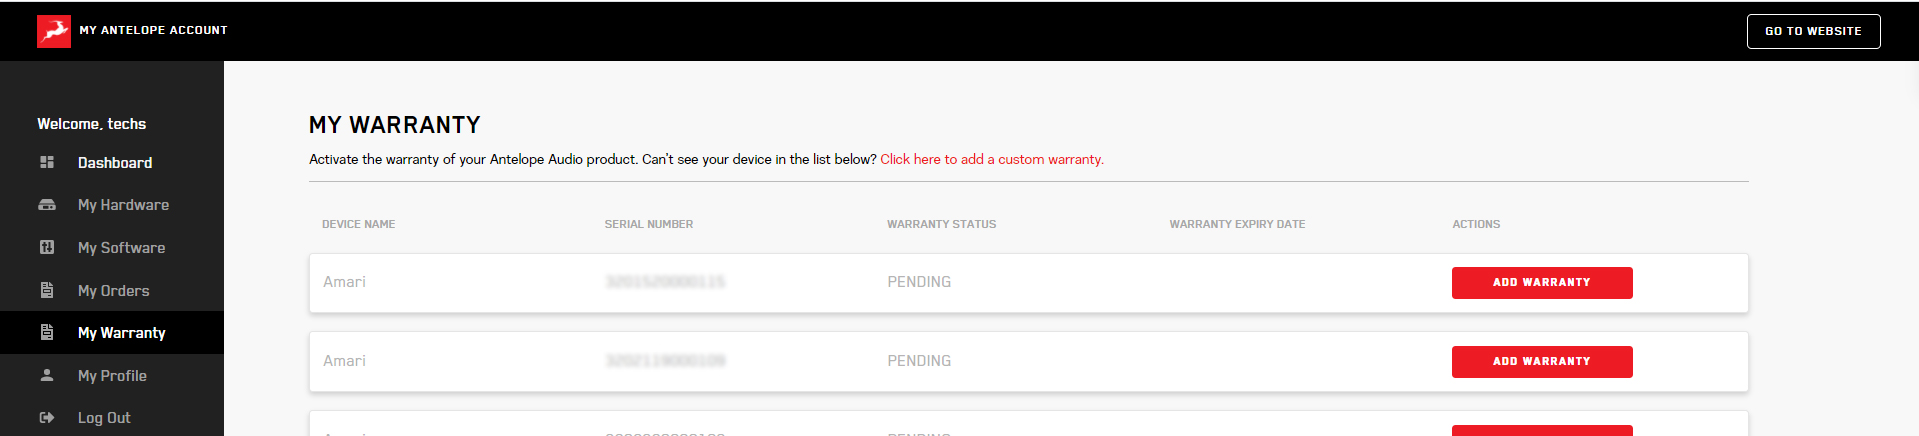
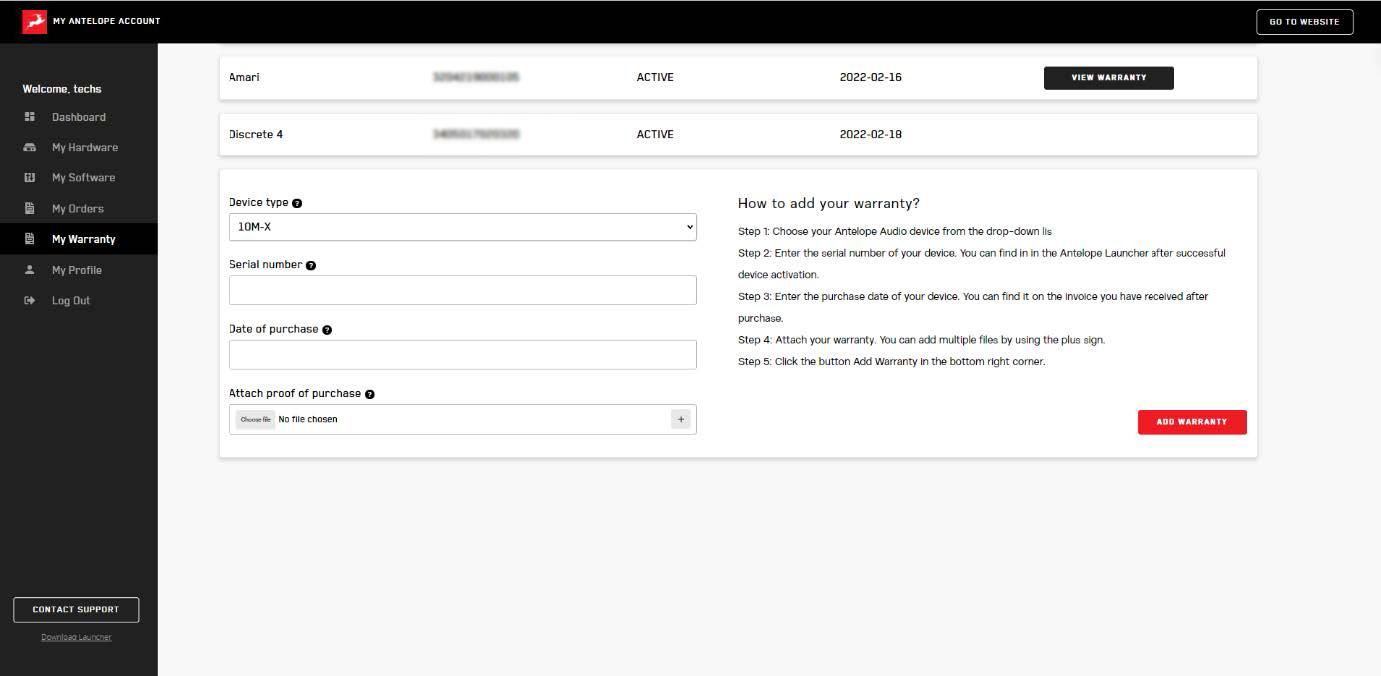
You will be required to activate your product warranty from the My Warranty tab in My Antelope Account. To activate your product, click on the text that sends you to the page where you can add a custom warranty.

1

On the following screen you will be asked to enter information about your new device and to attach your warranty. Select your device from the list under Device type and add a serial number. You can find it on the back side of your device’s rack ears. After entering the serial number enter the date of purchase.

The last step is to attach your warranty. You can add multiple files (up to five) by using the plus sign. Acceptable formats are .pdf, .jpg, .png, .jpeg, .heif, and the size limit is 7 MB per file. Once you have completed the steps click Add Warranty.

add war 2

After successfully completing the process, you can click on View Warranty to see if your file has been uploaded correctly.

DOWNLOAD THE Pure2 USER MANUAL

Need any help?

Visit the Antelope Audio Customer Support page, choose your device and find the required information.

Pure2 のアクティベーションは、機器の初回起動時に必要となる必須のプロセスです。製品の保証を有効にし、製品の使用を開始するために必要となります。

製品アクティベーションは以下の手順で行ってください。なお、製品のアクティベーションにはインターネット接続が必要です。

Pure2 ユーザーマニュアルをダウンロードする

Step 1: はじめに

AC 電源ケーブルを使って Pure2を電源コンセントに接続する。USB ケーブルを使って本機をコンピューターに接続する。

Step 2: Pure2 Launcher / Control Panel のインストール(macOS & Win)

Windows または macOS 用の Pure2 Launcher / Control Panelアプリケーションをこちらからダウンロードしてインストールしてください https://support.antelopeaudio.com/support/solutions/articles/42000017507-pure2-download-section

インストールウィザードの手順に従って Launcher / Control Panel を開き、インストールします。

10mx start wizard

Step 3: Pure2 をアクティベートする

インストールが完了したらアプリケーションを起動します。アプリケーションから直接 Antelope ID を作成するように促されます。必要な情報を入力しContinueをクリックします。既に有効な Antelope ID を持っている場合はUse existing Antelope IDをクリックします。

なお、 Antelope ID は別のものであり、www.antelopeaudio.com でのあなたのユーザープロファイルとは関係ありません。

10mx get started

認証情報を使ってサインインしてください。Antelope ID を作成したばかりの方は、受信したメールに記載されているリンクを使って ID を有効にしてください。

10mx get started 2

Antelope ID のサインインに成功すると、最近の購入に関する追加情報を入力するよう求められます。

10mx get started 3

必要な情報を入力したら Done をクリックします。これで Pure2 を使用することができます。

Step 4: 製品保証のアクティベート

最後に製品保証をアクティベートする必要があります。これは My Antelope Account の My Warranty タブから行います。 製品保証を有効にするには、テキストをクリックしてカスタム保証を追加するページに移動します。

1

次の画面では新しいデバイスに関する情報の入力と、保証書の添付が求められます。「Device type」のリストからお使いのデバイスを選択し、シリアル番号を追加します。シリアル番号はお使いのデバイスのラックイヤーの裏側に記載されています。シリアルナンバーを入力したら購入日を入力します。プラス記号を使って複数のファイル(最大5つ)を追加することができます。使用可能なフォーマットは、.pdf、.jpg、.png、.jpeg、.heifで、1つのファイルのサイズ制限は 7MB です。ステップが完了したら Add Warranty をクリックしてください。

add war 2

プロセスが正常に完了した後 View Warranty をクリックすると、ファイルが正しくアップロードされたかどうかを確認することができます。

Pure2 ユーザーマニュアルをダウンロードする

お困りですか?

Antelope Audio Customer Support ページにアクセスし、お使いのデバイスを選択して必要な情報を見つけてください。

您在首次运行Pure2时,设备会强制要求您完成产品的激活过程,这个过程需要验证您的产品保修状态,方可开始使用产品。

为了顺利激活您的设备,请确保按照以下列出的说明进行操作。请注意,产品的顺利激活需要互联网络的连接。

下载Pure2用户手册

第一步:准备操作

将交流电源线连接至Pure2设备, 并将设备通过USB线连接至电脑

第二步:安装Pure2启动/控制面板(macOS或Win)

10mx start wizard

第三步:激活您的Pure2

安装完成并打开后,程序会提示您在程序内创建Antelope ID,您可以填写必要信息并点击Continue,如果您已经拥有一个有效的Antelope ID,您可以点击Use existing Antelope ID

请注意,这里的 Antelope ID 与您在 antelopeaudio.com 上的是不同的,并且与您在 antelopeaudio.com 上的用户个人资料无关。

10mx get started

使用您的信息登录,如果您刚刚创建了您Antelope ID,请不要忘记点击您邮箱中刚刚收到的邮件中的链接以激活账户。

10mx get started 2

在成功登录您Antelope ID后,您会被要求填写最近购买该设备的相关信息

10mx get started 3

在您填写完所需信息后,点击Done,您就可以开始使用您的Pure2了。

第四步:激活您的产品保修

您需要在AntelopeAudio官网My Antelope Account的My Warranty选项卡中填写您的保修信息,为了激活设备,请点击跳转页面的链接,在这里您可以添加自定义的保修内容。

1

在接下来的页面中,您会被要求与您新设备保修相关的信息,在下拉列表中选择设备类型并输入设备串号,您可以在设备的后面板或者机架耳上找到。另外需要你您填写购买的日期。

最后一步是附上您的保修单。您可以使用加号添加多个文件(最多五个)。可接受的格式为 .pdf、.jpg、.png、.jpeg、.heif,每个文件的大小限制为 7 MB。完成这些步骤后,单击添加保修。

add war 2

在成功完成上述过程后,您可以点击View Warranty来查看您上传的保修信息。

下载Pure2的用户手册
Close Menu

© 2016 Antelope Audio. All Rights Reserved