Getting Started with The Discrete 4 Synergy Core
This Discrete 4 Synergy Core product activation is a mandatory process required to be completed on the first run of the interface. It is needed to validate your product warranty and to gain access to our special software packages and exclusive product offers.
To activate your product, please make sure to follow the instructions listed. Bear in mind that internet connection is required for successful product activation.
Connect the Discrete 4 Synergy Core power adapter to an AC power source. Plug in the interface to your Windows or Mac computer. Press the On/Standby button to switch the interface on.
Click on the ‘Activate New Device’ button.
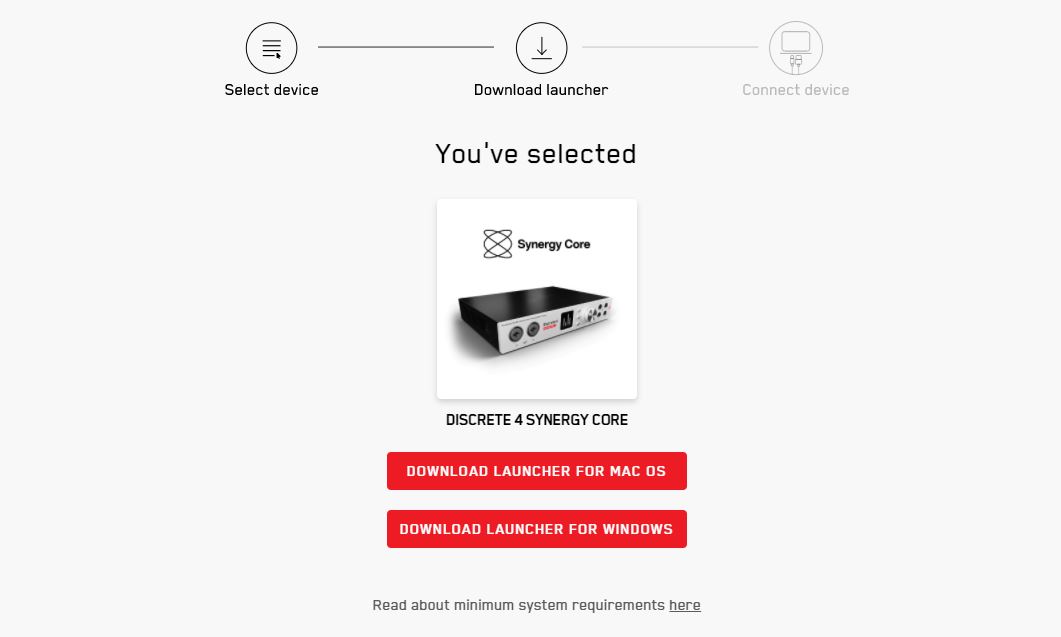
Choose the ‘Discrete 4 Synergy Core’ from the device list. Download and install the Antelope Launcher application for Windows or macOS.
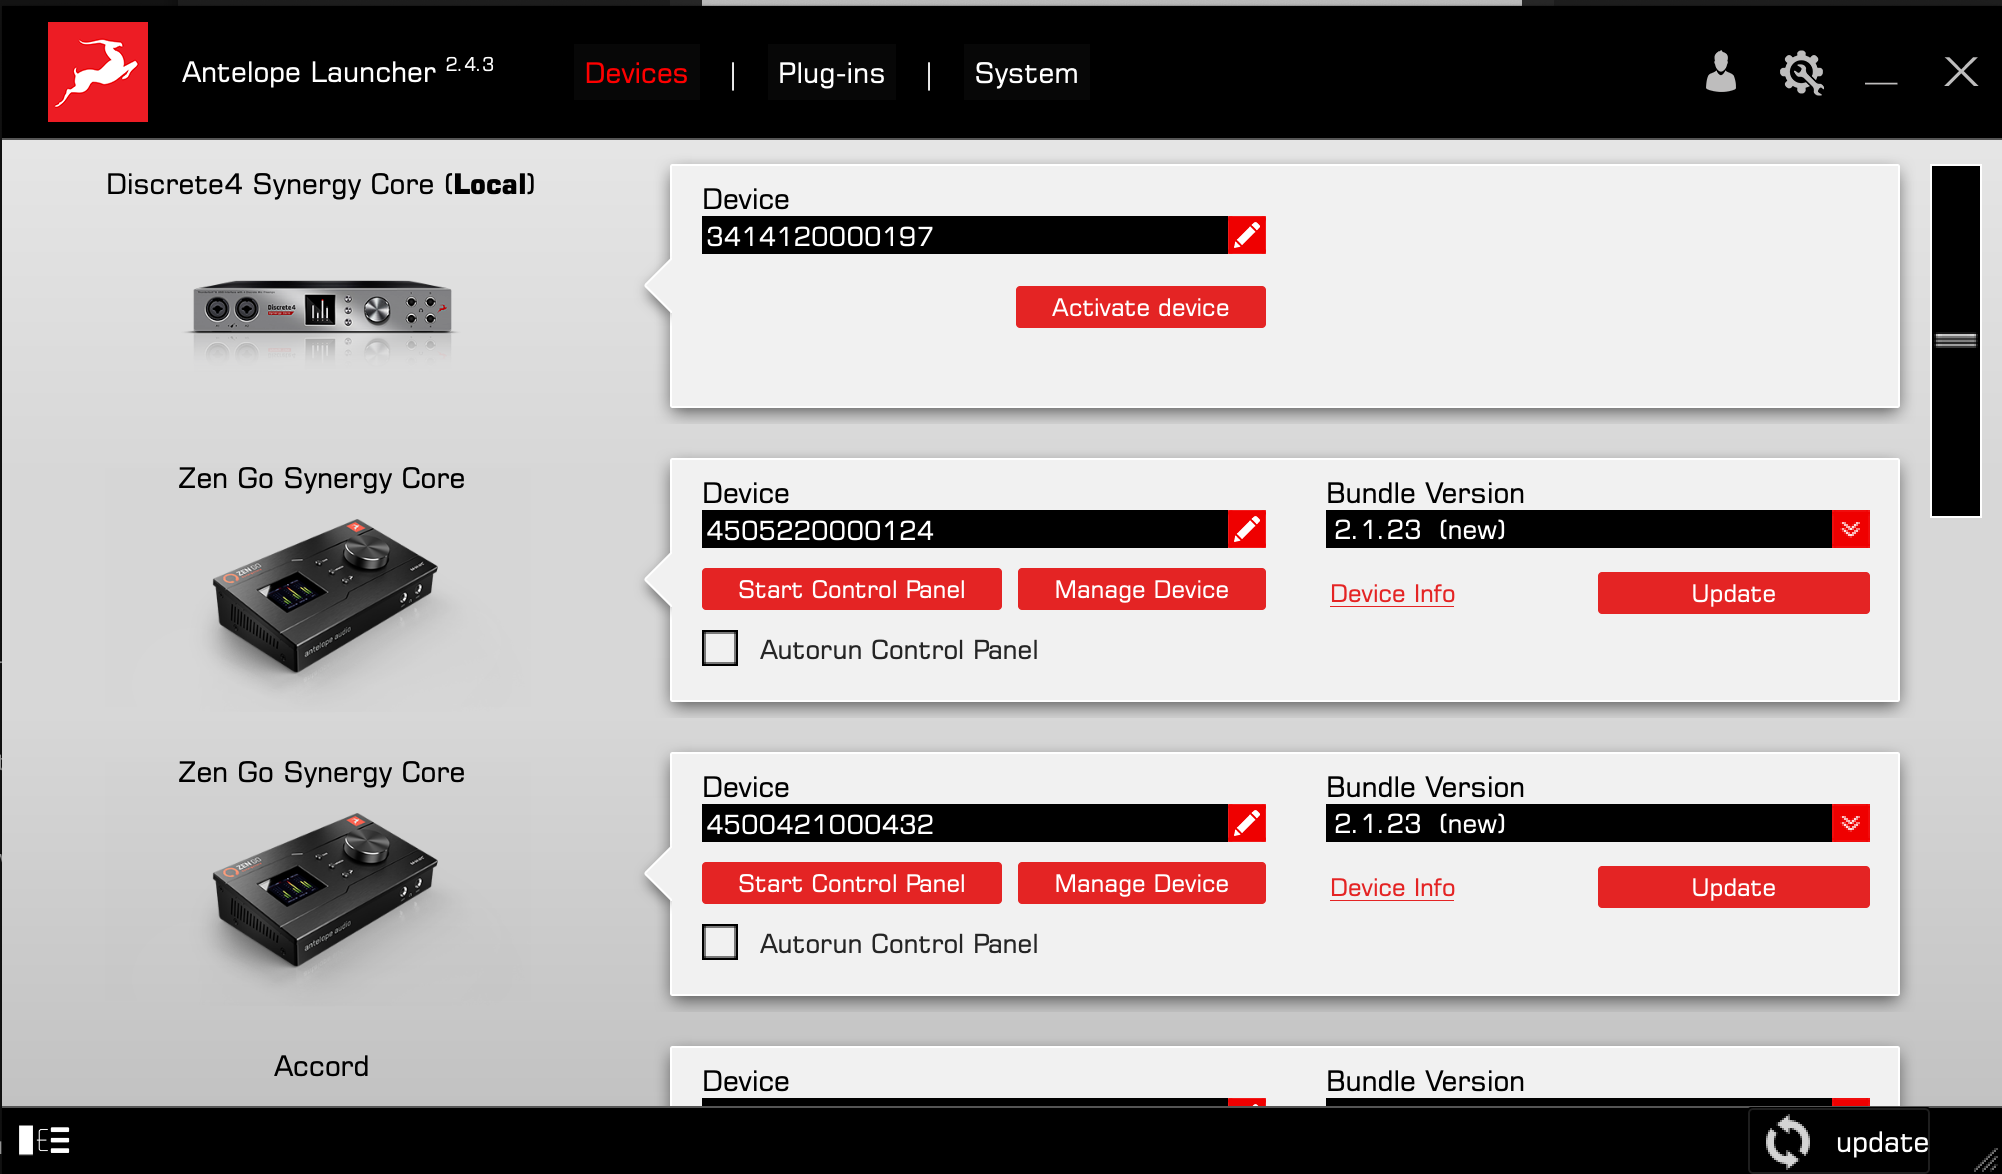
Once downloaded, open the Antelope Launcher application, and click on the ‘Login’ button. Enter the e-mail and password you used to login into the Antelope Audio user area and click ‘Login’. Then, click on ‘Activate device’. If the Discrete 4 Synergy Core does not appear in the ‘Devices’ tab, click on ‘Not seeing your device?’ and follow the on-screen instructions.
In the Antelope Management Wizard window, choose ‘Activate device or assign features’ and click ‘Continue’. In the subsequent window, place a checkmark next to ‘Register device’ and click ‘Continue’. Upon successful activation, the final window will read ‘Congratulations! You have successfully activated your device.’ Click ‘Done’ and the activation is finished.
After successful activation, it is time to complete the final step before you can use your interface. Update the Discrete 4 Synergy Core to the latest firmware and Control Panel versions. To do this, simply open Antelope Launcher and click the ‘Update’ button below the ‘Bundle Version’ drop-down menu.
Lastly, you will be required to activate your product warranty. This is done from the My Warranty tab in My Antelope Account.
If you have successfully activated your product, it should now appear under My Warranty. Click on Add Warranty.
On the following screen you will be asked to enter information about your new device and to attach your warranty. You can add multiple files (up to five) by using the plus sign. Acceptable formats are .pdf, .jpg, .png, .jpeg, .heif, and the size limit is 7 MB per file. Once you have completed the steps click Add Warranty.
After successfully completing the process, you can click on View Warranty to see if your file has been uploaded correctly.
Ready to set-up your interface and play audio? Here is how.
See how to set-up your new interface with your prefered DAW here:
You can now move on to our Advanced Tips & Trick playlist:


