Get Started guide
Thank you for choosing Antelope Audio!
This guide will help you get started with your new Antelope Audio interface and download all required software. Completion of the process is needed to validate your warranty and gain access to special software packages and exclusive product offers.
An internet connection is required for successful product activation.
Step 1
Create an Antelope Audio User Account
To activate your device and fully utilize all of its features, you will need to create an Antelope account.
To create an account, please click here.
Existing users can log in here.
Step 2
Download the Antelope Launcher
Download the Antelope Launcher for your operating system. Install the application following the on-screen instructions and log in using your Antelope account.
* If you already have the Antelope Launcher installed – make sure you are running the latest available Manager Server version in the System tab.
Step 3
Choose your Device
Step 4
Connect Device
- Make sure you have installed the latest available bundle version of your Antelope interface (Orion / Galaxy series). On macOS, Unified Driver 4.6 will be installed during this process. For Apple Silicon computers follow the installation guide here.
- Make sure you have Manager Server version 1.8.19 or higher installed (System tab in the Antelope Launcher)
We recommend connecting the device to your Mac or PC with the cable provided with the remote controller. The device will be automatically recognized by the Antelope Launcher, and you can safely proceed to the next step.
We recommend connecting the device to your Mac or PC with the cable provided with the А4 device. The device will be automatically recognized by the Antelope Launcher, and you can safely proceed to the next step.
*The analog processing for your A4 product is fully functional without activation or being connected to a computer. However, activation is required to validate the warranty and gain access to the remote control stand-alone app, as well as the A4 bridge plugin.
We recommend connecting the device to your Mac or PC with the cable provided with the interface. The device will be automatically recognized by the Antelope Launcher, and you can safely proceed to the next step.
If your computer has only USB-А ports, please use an adapter (included) or а USB-А cable (not included).
We recommend connecting the device to your Mac or PC with the cable provided with the interface. The device will be automatically recognized by the Antelope Launcher, and you can safely proceed to the next step.
If your computer has only USB-A ports, please use the USB-C to USB-A adapter included in the box.
We recommend connecting the device to your Mac or PC with the cable provided with the interface. The device will be automatically recognized by the Antelope Launcher, and you can safely proceed to the next step.
If your computer has only USB-C ports, please use an adapter or USB-C cable (not included).
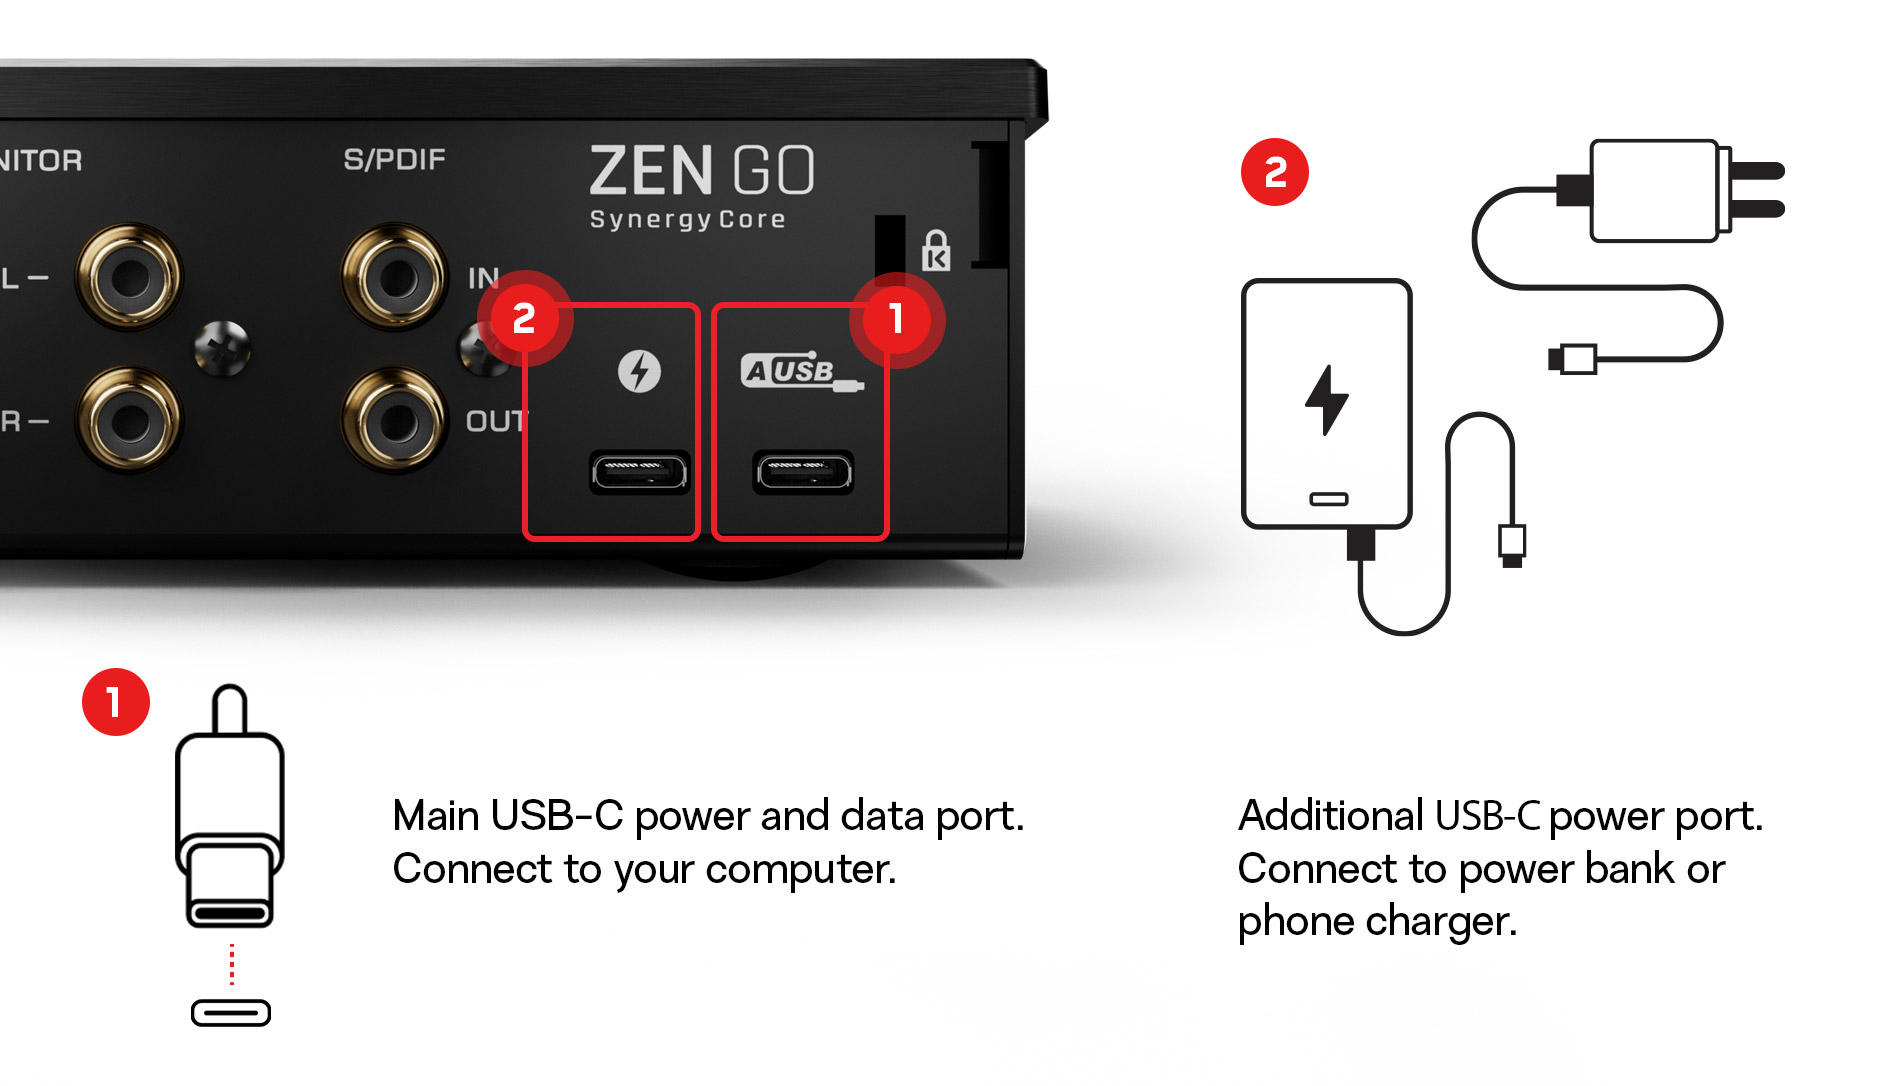
Connect the Zen Quadro SC primary USB 1 port to your Mac or PC with the cable provided with the interface. The device will be automatically recognized by the Antelope Launcher, and you can safely proceed to the next step.
If your computer has only USB-А ports, please use the USB-C to USB-A adapter included in the box.
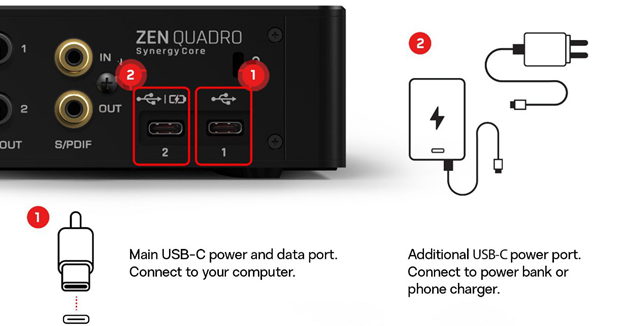
Zen Quadro Synergy Core is a USB-C bus-powered interface and therefore it requires steady power from the computer ports. It is recommended to use ports such as USB 3, USB 3.1/USB-C that are located on the motherboard. Even though USB 2.0 ports may still be used, some may not deliver enough power. In such a case, the secondary USB 2 port can be used

• You can connect your device to a Thunderbolt port of your computer. No cable is included.
• Your device will not get recognised in the Antelope Launcher and DAW until you install the necessary macOS / Windows driver in Step 4.
• We recommend using Apple certified cables and adapters, no longer than 2m/6,5ft
Thunderbolt 2 interfaces are compatible with Thunderbolt 3 ports using TB2 to TB3 adapter.
Thunderbolt 3 interfaces are backwards-compatible with Thunderbolt 2 ports using TB2 to TB3 adapter.
Zen Go TB and Zen Q TB are compatible with Thunderbolt 3 ports only.
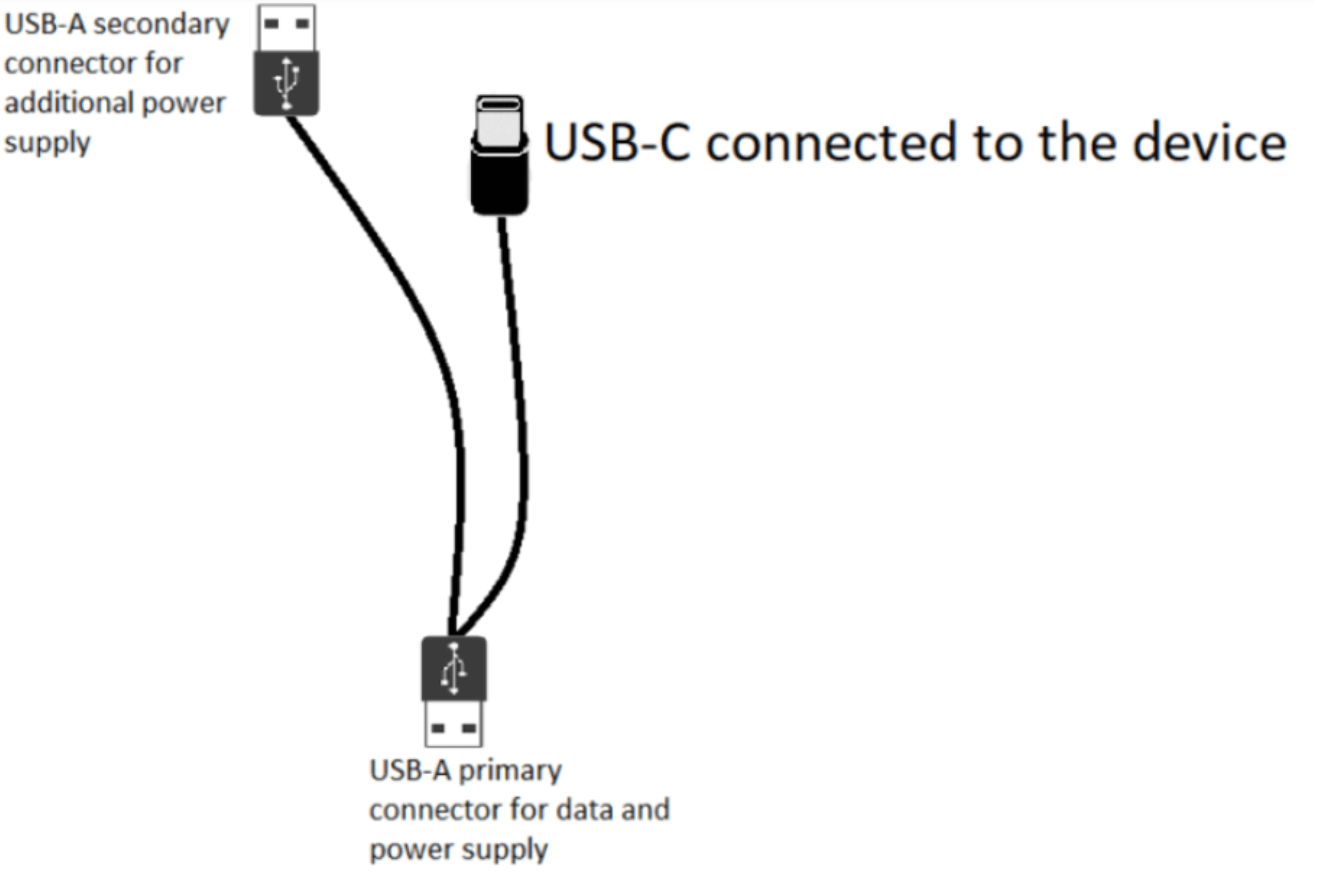
The primary USB-A connector should go into the computer’s USB 2/3 port, preferably located on the motherboard, which on PCs are usually placed on the back of the computer case. In case of an insufficient power supply, you can connect the secondary USB–A connector to the computer in order to provide more power.
Zen Go Synergy Core is a USB-C bus-powered interface and therefore it requires steady power from the computer ports. It is recommended to use ports such as USB 3, USB 3.1/USB-C that are located on the motherboard. Even though USB 2 ports may still be used, some may not deliver enough power. In such a case, the additional USB-C power port must be used.
Step 5
Install Drivers
- For macOS users
- For Windows users
Step 5
Install Drivers
For macOS, Unified Driver 4.6 is installed as part of the audio interface bundle.
For Windows, no drivers are required.
You can safely proceed to the next step.
Step 5
Install Drivers
- For macOS users
- For Windows users
Step 5
Install Drivers
- For macOS users
- For Windows users
Minimum 10.14 Mojave, Recommended 11 Big Sur
USB:
All of our audio interfaces are Class Compliant and can run straight out of the box without a driver installation.
However, we recommend installing the Antelope Unified Driver following the steps below, for improved performance and compatibility with afx2daw.
Thunderbolt™:
To operate the device via Thunderbolt, please install the Antelope Unified Driver following the steps below.
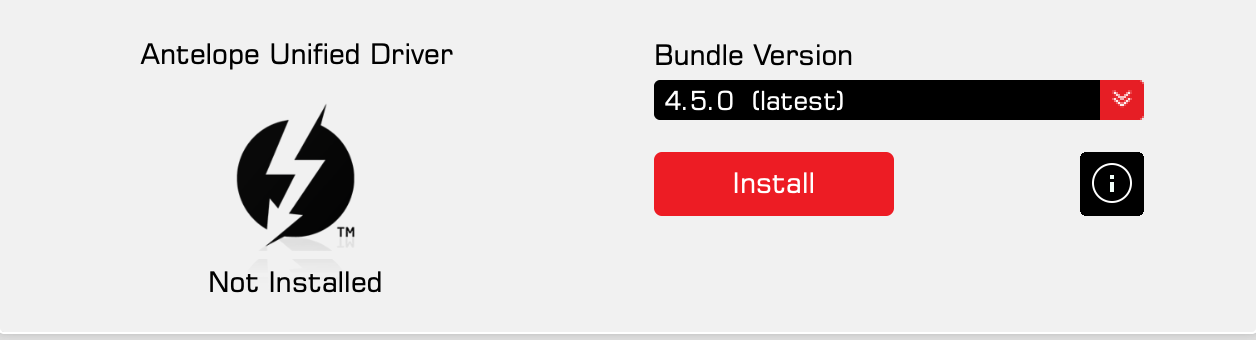
From the System tab, select the latest version in the Antelope Unified Driver field and click Install.
* If you are an owner of an M1 Apple Silicon-powered computer follow the installation guide here
* If you are running OS 10.15 Catalina or higher, please go through this article to allow the driver installation in the Security and Privacy settings.
Zen Quadro SC is a Class Compliant device and can run straight out of the box without a driver installation.
However, we recommend installing the Antelope Unified Driver following the steps below to ensure optimal performance and stability.
Navigate to the SYSTEM tab in the Antelope Launcher and click Install on the latest available Bundle version for the Antelope Unified Driver:
* If you are an owner of an M1 Apple Silicon-powered computer follow the installation guide here
* If you are running OS 10.15 Catalina or higher, please go through this article to allow the driver installation in the Security and Privacy settings.
Minimum 10.14 Mojave, Recommended 14 Sonoma
If you have other Antelope Audio interfaces, please download and install Unified Driver version 4.6 to ensure the A4 product is visible inside the Antelope Launcher.
For Apple Silicon computers follow the installation guide here
If you don’t have other Antelope Audio products, you can safely proceed to the next step. The A4 device will be fully operational if no driver is installed.
Minimum Windows 10/11
USB:
Тhe USB driver will be installed during Step 6. You can safely proceed to the next step.
Thunderbolt™:
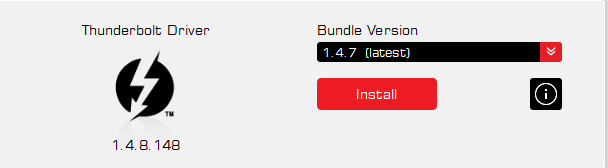
The Windows Thunderbolt driver can be installed from the System tab of the Antelope Launcher. Select the latest version from the drop-down menu, put a checkmark in the empty box and click Update in the bottom right corner.
* Please, make sure you have the Microsoft Thunderbolt™ Control Center installed – you can download the file from here:
* Our Windows Thunderbolt Driver supports only ASIO operation in DAW applications and does not have a WDM (Windows Audio) mode yet.
To enable Windows audio via Thunderbolt, a third-party software is required. We recommend Voicemeeter, which you can download from here:
* The driver is not yet compatible with Thunderbolt™ 4 ports on Windows.
Тhe USB driver will be installed during Step 6. You can safely proceed to the next step.
No drivers are required for Windows users. You can safely proceed to the next step.
Step 6
Activate Device
Click on Activate and proceed with the on-screen instructions. The device will restart after successful activation.
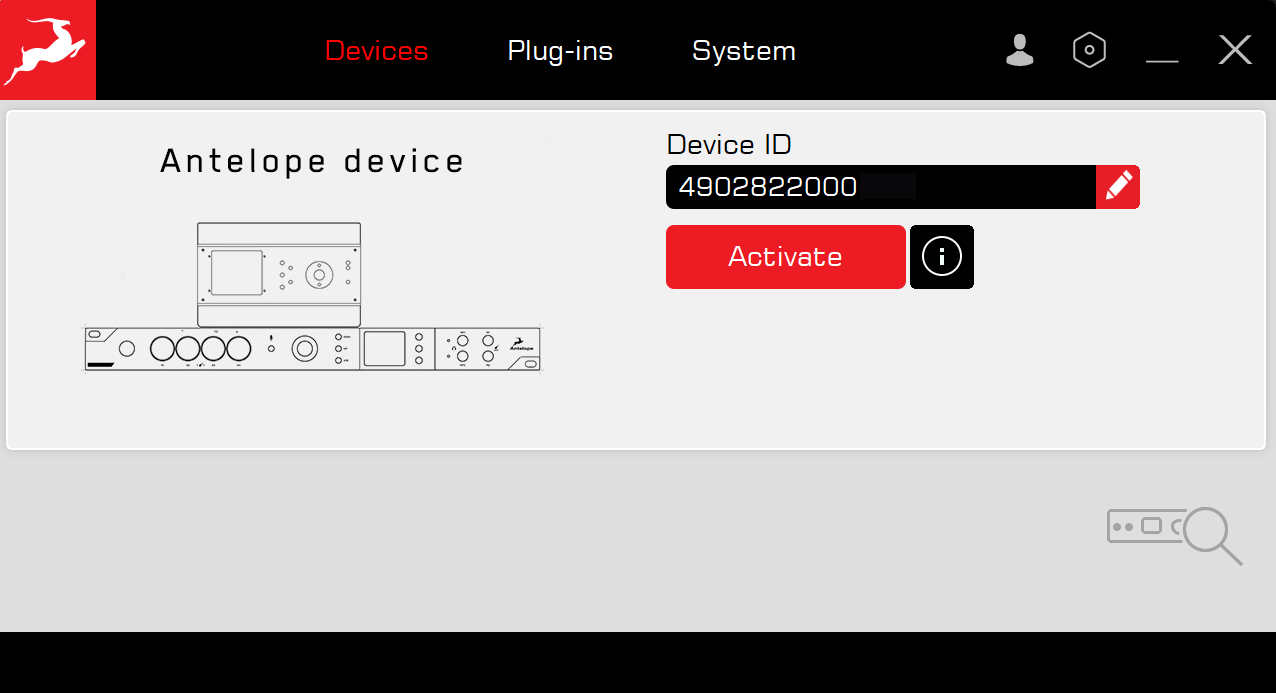
During the activation process, you can also pair any standard and promotional software bundles available in your account with your device.
Step 7
Install Software Bundle
After successful activation of your device, click on “Software Installation” to install or update to the latest available software components.
* On Windows via a USB connection – this step will also install the latest driver for your device.
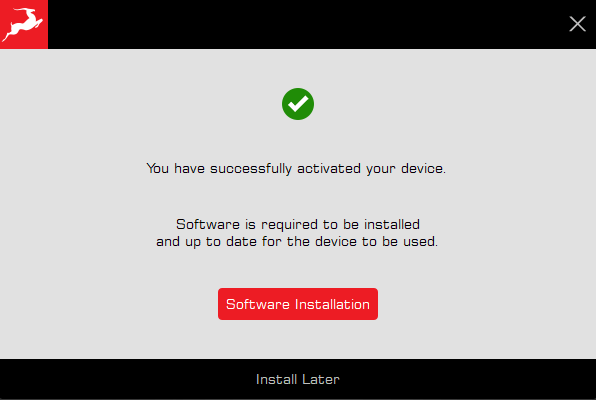
The device will restart after a successful installation.
Plugin installation (optional)
If you want to control your A4 device directly from your DAW and use DAW automation, you can also download the optional A4 bridge plugin (VST3/AU/AAX available).
Go to the Plugins tab in the Antelope Launcher. Select “A4 Bridge Plugins” from the leftmost drop down menu. Press “Install” to download and install the plugin.

Step 8
Activate your product warranty
Lastly, you will be required to activate your product warranty. This is done from the My Warranty tab in My Antelope Account.
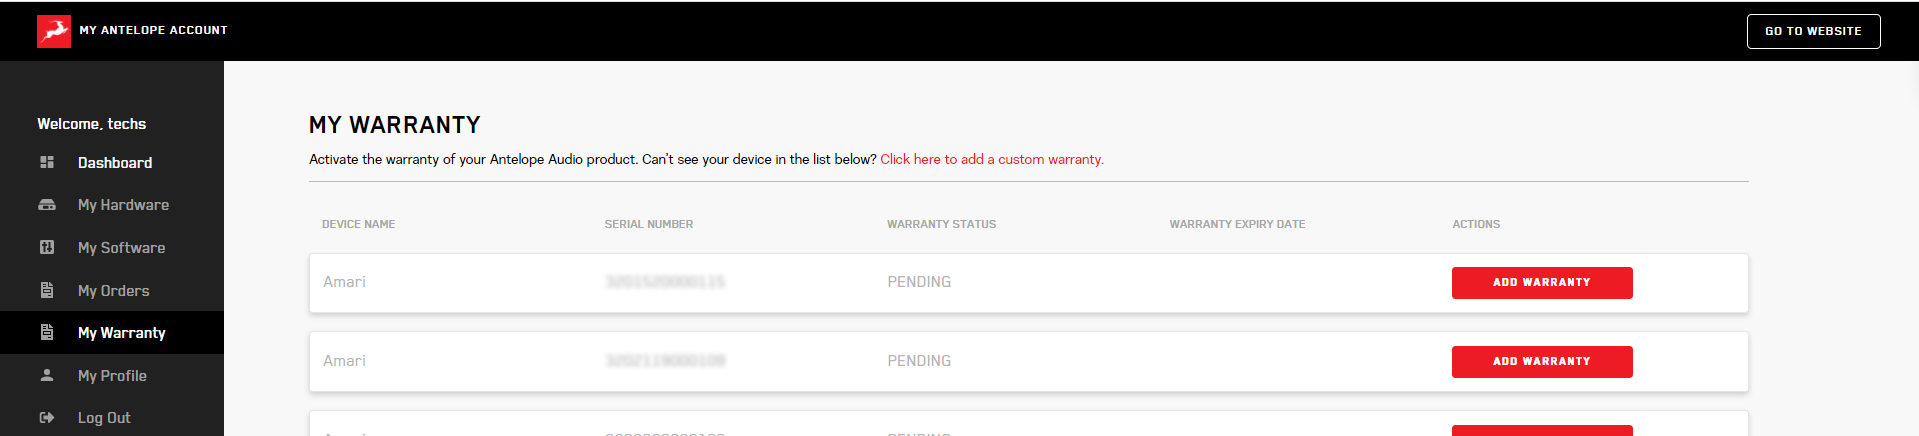
If you have successfully activated your product, it should now appear under My Warranty. Click on Add Warranty.
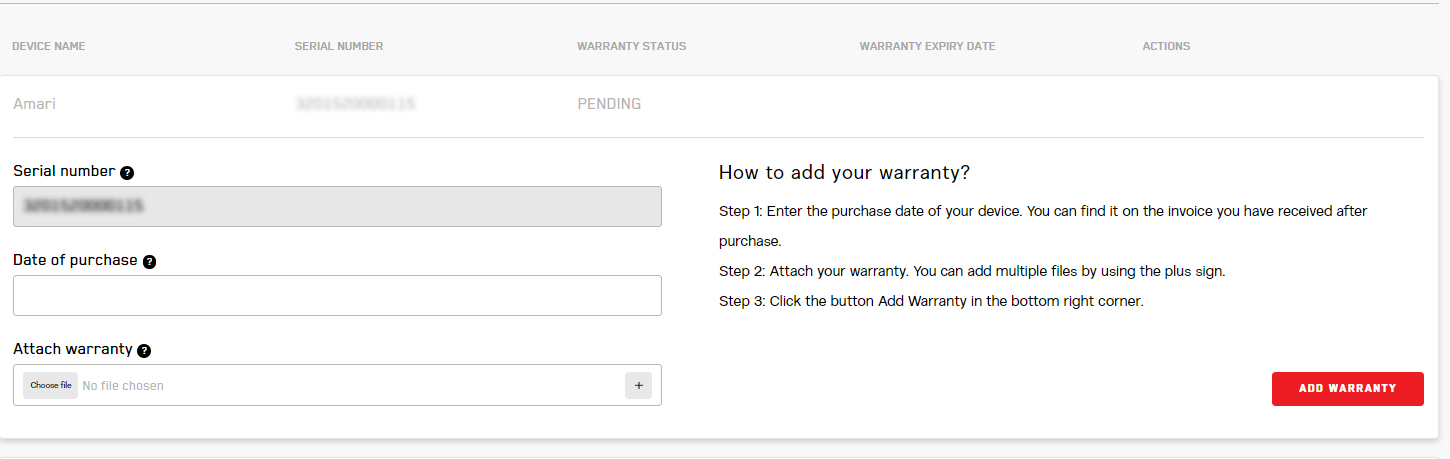
On the following screen you will be asked to enter information about your new device and to attach proof of purchase. You can add multiple files (up to five) by using the plus sign. Acceptable formats are .pdf, .jpg, .png, .jpeg, .heif, and the size limit is 7 MB per file. Once you have completed the steps click Add Warranty.

After successfully completing the process, you can click on View Warranty to see if your file has been uploaded correctly.
You are set and ready to use your new audio interface!
Need any help?
Visit the Antelope Audio Customer Support page, choose your device and find the required information.